Stamping with Friends - CASEing the Catty Peaceful Place Scrapbook Page
Welcome to another Stamping with Friends Blog Hop. We are CASEing (Copy and Share Everything) the Annual 2021-2022 or the August-December 2021 Mini.

SUPPLIES:
Stamps/Dies/Bundles:
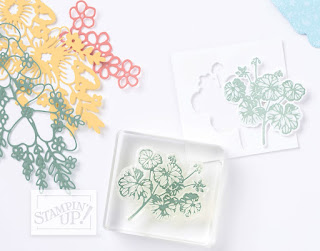
156816 Peaceful
Cabin Bundle (English)
Paper:
Peaceful Place 12" X 12" (30.5 X 30.5 Cm) Specialty Designer
Series Paper
131202 Smoky Slate 8-1/2" X 11" Cardstock
121044 Basic
Gray 8-1/2" X 11" Cardstock
159231 Basic
White 12" X 12" (30.5 X 30.5 Cm) Cardstock
Ink:
132708 Tuxedo
Black Memento Ink Pad
Optional:
152494 In
Good Taste Designer Series Paper
153620 Flowers For Every Season Ribbon Combo Pack
153510 Red & Green 12" X 12" (30.5
X 30.5 Cm) Foil Sheets
153518 Black 12" X 12" (30.5 X 30.5 Cm) Glitter Paper
Measurements:
Basic White (or Very Vanilla 12" x 12" left whole for backing
One sheet of Designer Series Paper left whole
Two pieces of dsp 1.5" x 8.5"
One piece of dsp 6" x 6" cut in half at the diagonal
One piece of dsp 3" x 2.5"
Shaded Spruce 3" x 6" (back with adhesive sheet to make it easier to adhere)
Smoky Slate and Basic Gray 2.5" x 1.75" each
Green Foil 2.5" x 1.75"
In Good Taste Designer Series Paper 3" x 2.5"
(Photo I used is 8.5" x 7 ")
Instructions:
Step 1: Glue Peaceful Place Designer Series Paper to the Basic White (or Very Vanilla) 12" x 12" Cardstock for support.
Step 2: Place photo as desired with the diagonal piece in the upper right hand corner and layer the two pieces of dsp 1.5" x 8.5" at right angles to form the other parts of the frame. Before gluing down tie a piece of Misty Moonlight/Silver Baker's Twine from the Flowers for Every Season Ribbon Combo Pack or other twine of your choice.
Step 3: With Tag Punch punch out the piece of dsp 3" x 2.5" and the Green Foil piece.
Step 4: Place the stars die over the dsp and die cut. Adhere it to the Green Foil and place where opening is formed at the top left. Optional is the piece of Black Glimmer paper that I had on hand. It measures 2.75" x .75" and I placed it on the top left to add a little sparkle.
Step 5: Die cut the letters, numbers and trees from the Shaded Spruce Cardstock (back it first with the adhesive sheet to make it easier to stick the pieces to the cardstock and dsp).
Step 6: Punch out the Basic Gray and Smoky Slate pieces with the Tag Punch.
Step 7: Place the tags where desired on the page using dimensionals. Add the letters and numbers.
Step 8. Die cut the large Cabin from the In Good Taste DSP - the woodgrain makes it look like a real cabin. Then using the best size rectangular die from the Hippo Dies to cut the cabin out. Stamp the fence onto the remaining piece of dsp and die cut with the fence die. I also stamped the fox onto a scrap of the same dsp as well as one onto a scrap of the Smoky Slate using the Tuxedo Memento inkpad and cut each out with the fox die.
Step 9: I also backed a small scrap of Misty Moonlight Cardstock with a piece of adhesive strip and die cut the small fence die.
Step 10: Decorate as you wish!
Of course, any of the above products can be substituted and the layout angled as it is in the catalogue. This is just an example of a scrapbook page using the Peaceful Place Bundle and DSP. These are some of my favourite products for scrapbooking.
To shop for these products, go to Peaceful Place Scrapbook Page
To see the next project in this fun hop, click on the image below:

For all the wonderful projects in this hop, see
Libby Fens
Linda Moore
Donna Schnees
Sandra Roberts
Karen Egan
Tricia Butts
Victoria Littlewood
Caron Bailey
Tina Hewett
Xenia Stanford


I'm so not a scrapbooker, but, I love the DSP that you used in this CASE project.
ReplyDeleteMaybe I can convert you into a scrapbooker!
DeleteGreat scrapbook page Xenia x
ReplyDeleteThanks Karen!
Delete