
As soon as I saw the new Cup
of Tea Bundle and Tea Boutique Designer Series Paper, I knew this was the first
purchase I would make from the 2022-2023 Annual Catalogue. Who doesn’t love a
cuppa? Well I am sure there are a few but the first thing I thought was I must
make a card that would fit a packet of tea and make it look like
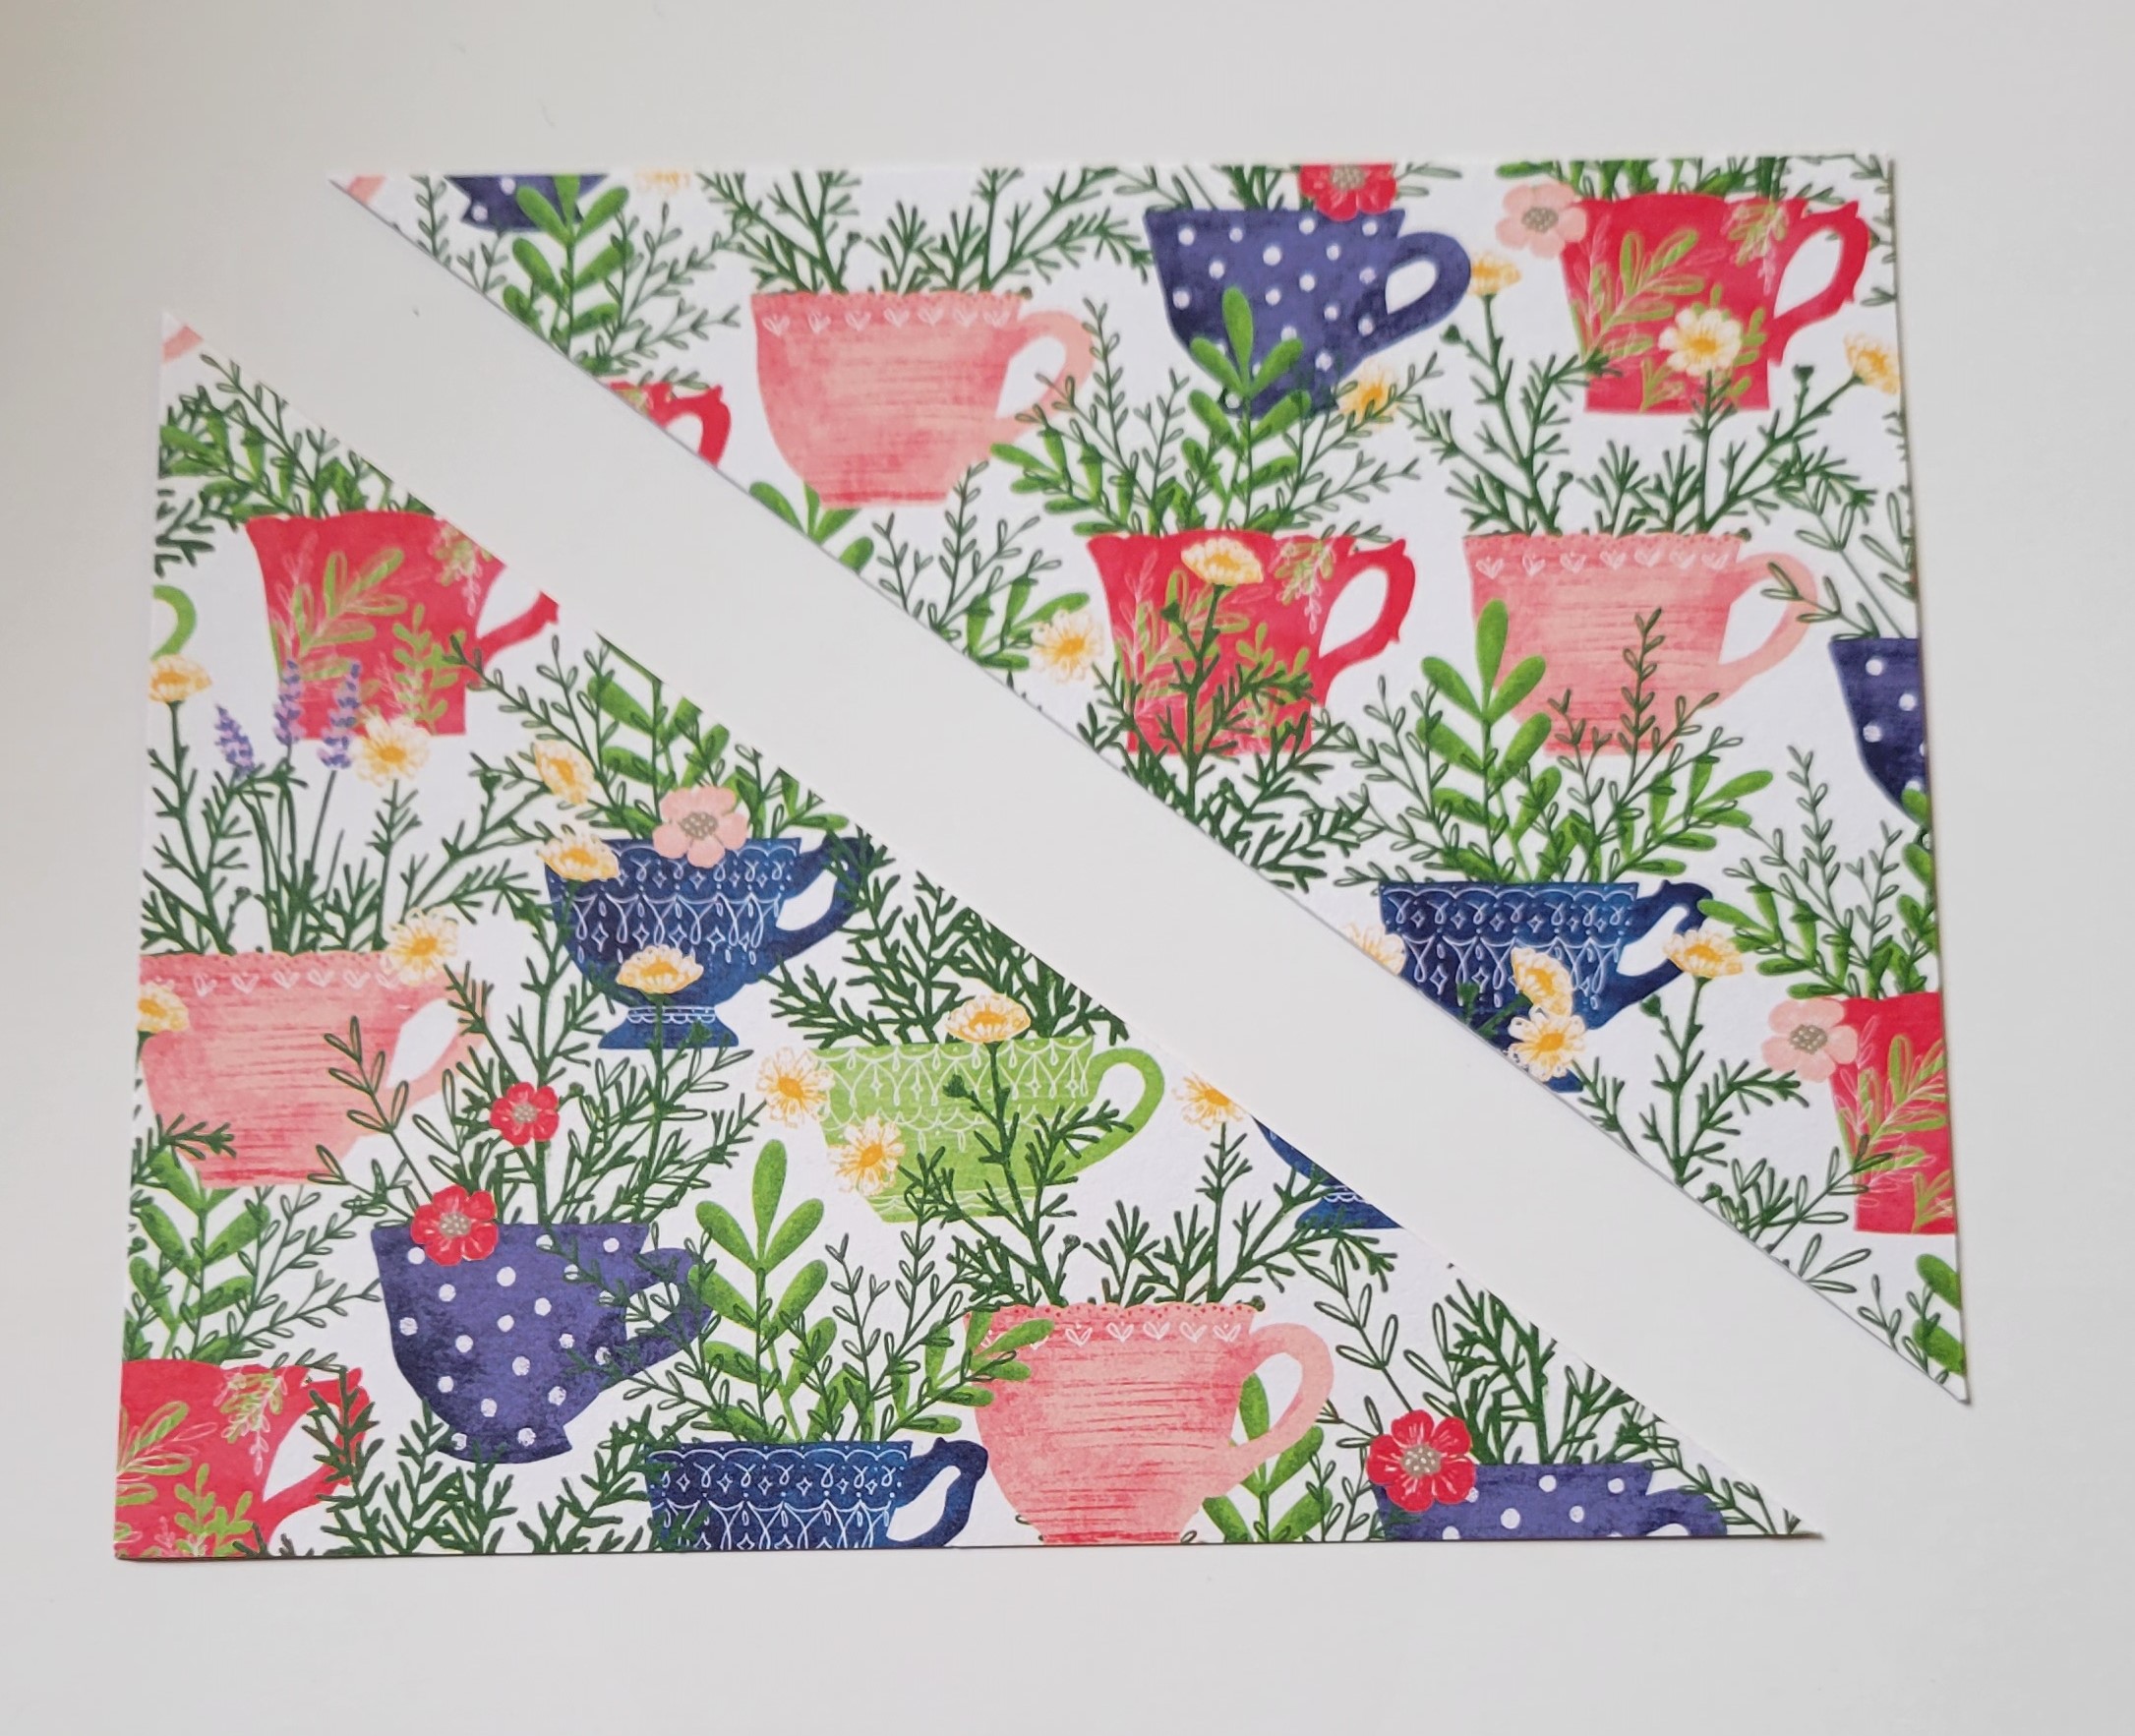
the packet was in the tea cup. After thinking of different options, I decided upon the criss-cross funfold. It shows off various sides of the
lovely designer series paper and a teacup can be placed at the top where the
two flaps meet. The packet can be tucked in behind that and it still fits a
removable greeting insert with lots of room for a message and you can use the
back of it too for a longer note.
Supplies
158667 CUP OF TEA BUNDLE (ENGLISH)
158659 TEA BOUTIQUE 6" X 6"
(15.2 X 15.2 CM) DESIGNER SERIES PAPER
159204 2022–2024 IN COLOR™
8-1/2" X 11" CARDSTOCK
159276 BASIC WHITE 8-1/2" X
11" CARDSTOCK
161108 2022–2024 IN COLOR CLASSIC
STAMPIN' PADS
Optional to embellish the
card are
159186 2022-2024 IN COLOR MATTE
DECORATIVE DOTS
159195 2022–2024 IN COLOR BAKER'S
TWINE PACK
You can glue both flaps closed if you wish. I like to have one open
so the card will sit on a table or shelf to display it. I used the baker’s
twine to tie it closed until the recipient wishes to open and display. Another
option would be to get the 2022–2024 IN
COLOR™ 12" X 12" (30.5 X 30.5 CM) CARDSTOCK to make a
bellyband. Or you could use the IN COLOR ribbon.
The Tea Boutique Designer Series Paper includes the following colours: Crumb Cake, Crushed Curry, Fresh Freesia, Orchid Oasis, Parakeet Party, Petal Pink, Starry Sky, Sweet Sorbet, Tahitian Tide
I recommend the following
Adhesives
154031 TEAR & TAPE
ADHESIVE
152334 ADHESIVE SHEETS
104430 STAMPIN’ DIMENSIONALS
152813 STAMPIN' SEAL
Tools you will need are a paper trimmer, die cutting machine, blocks or stamparatus (which I can’t live without!)
Measurements:
BASE: 1 sheet of IN COLOUR Cardstock scored at 5.5” and then cut in half to form two pieces of 4.25”x11”
DESIGNER SERIES PAPER
for patterns where it is obvious one side is up, make sure to put
the paper in the trimmer facing you and cut at 4”, turn and cut at 5” to form a
4”x5” piece. (Save the scraps!)
INSERT:
BASIC WHITE cardstock
5.25”x3.75”
TRIM for top of insert, cut
.75”x5.25” from the Designer Series Paper scraps
BELLYBAND (optional)
12”x1.5” strip
I used twine to close
Step-by-Step
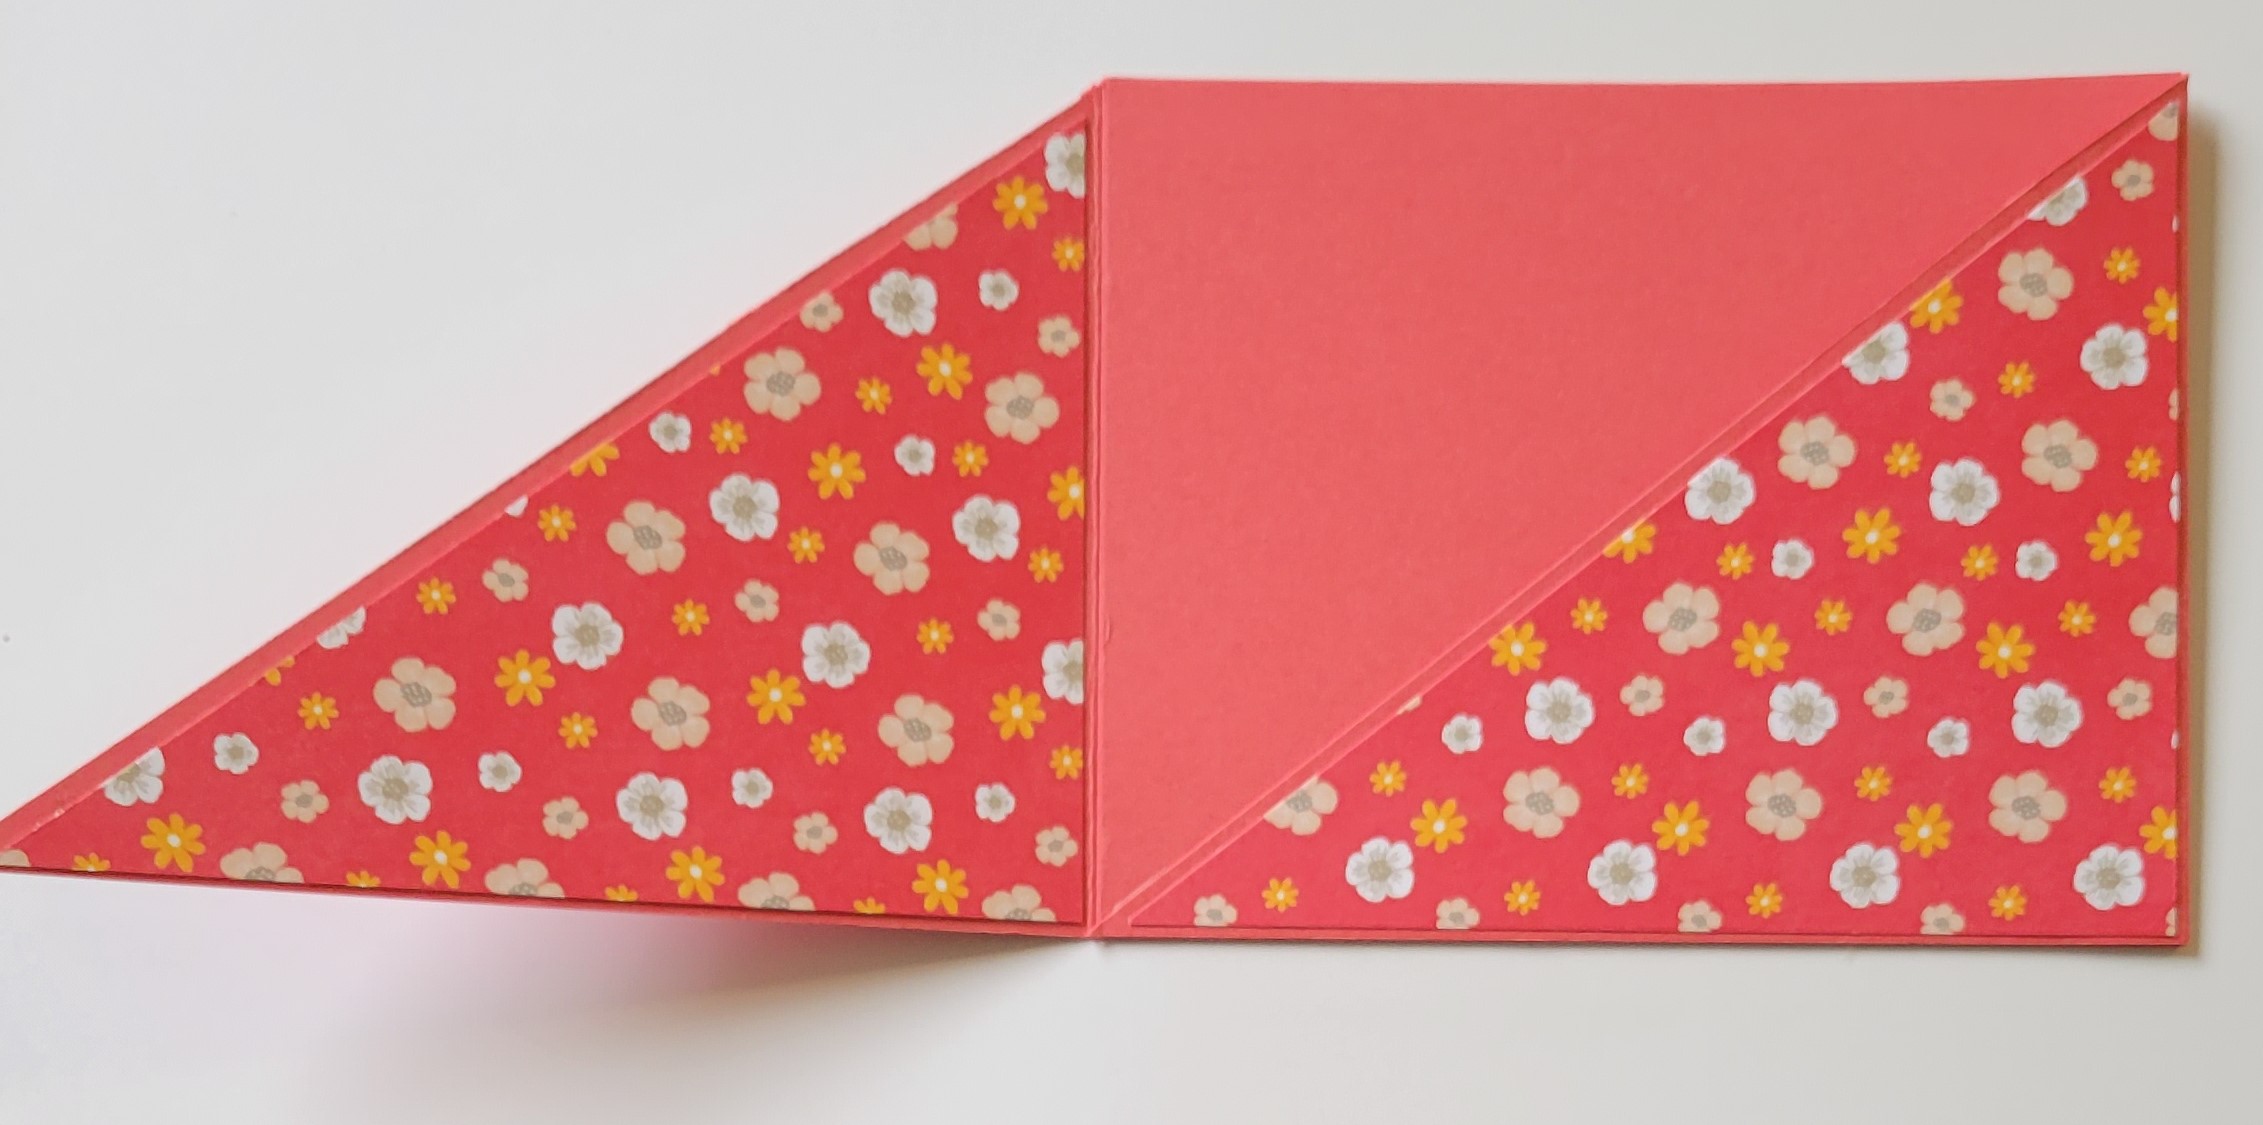
Step 1: Score an entire sheet of 11”x8.5” In Colour cardstock down the centre at 5.5. Turn and cut in half at the 4.25” to form two pieces of 4.25”x11” cardstock for the base.


Step 3: You will have two pieces with a rectangular section and an diagonally cut section. Place adhesive on the rectangular section of one piece and lay the other over to adhere them with the long diagonally cut edges along the bottom.


Step 4: Prepare the designer series paper for the
front flaps of the card. For patterns where it
is obvious one side is up, make sure the 4"x5" section is upright (put the paper
in the trimmer facing you and cut at 4”, turn and cut at 5” to form a 4”x5”
piece.) (Save the scraps for use later)


Step 6: Adhere one piece to the front left flap and flip the second piece to adhere to the second flap. (If making more than one card, you can mix and match different patterns and if you leave one flap open, you can use a second diagonal piece on the inside of the flap left open. I didn't like the lack of contrast of the reverse piece compared to the base colour, so I did a new 4"x5" piece cut diagonally and used both pieces for the right flap and inside left). Decorate the inside of the right flap if leaving it open.

Step 8: Die cut a solid teacup from one of the matching designer series paper sheets. Using Adhesive Sheet on the back of coordinating solid cardstock, cut the teacup with leaf pattern (I used scraps from the diagonal cuts). Remove backing of adhesive strip and adhere detailed die cut over the solid teacup.
Step 9: Place two dimensionals on the top center of the front flap where it will cross over the bottom flap. Add a dimensional at the bottom under the two others. Place a piece of twine from second down top dimensional up to the top one.
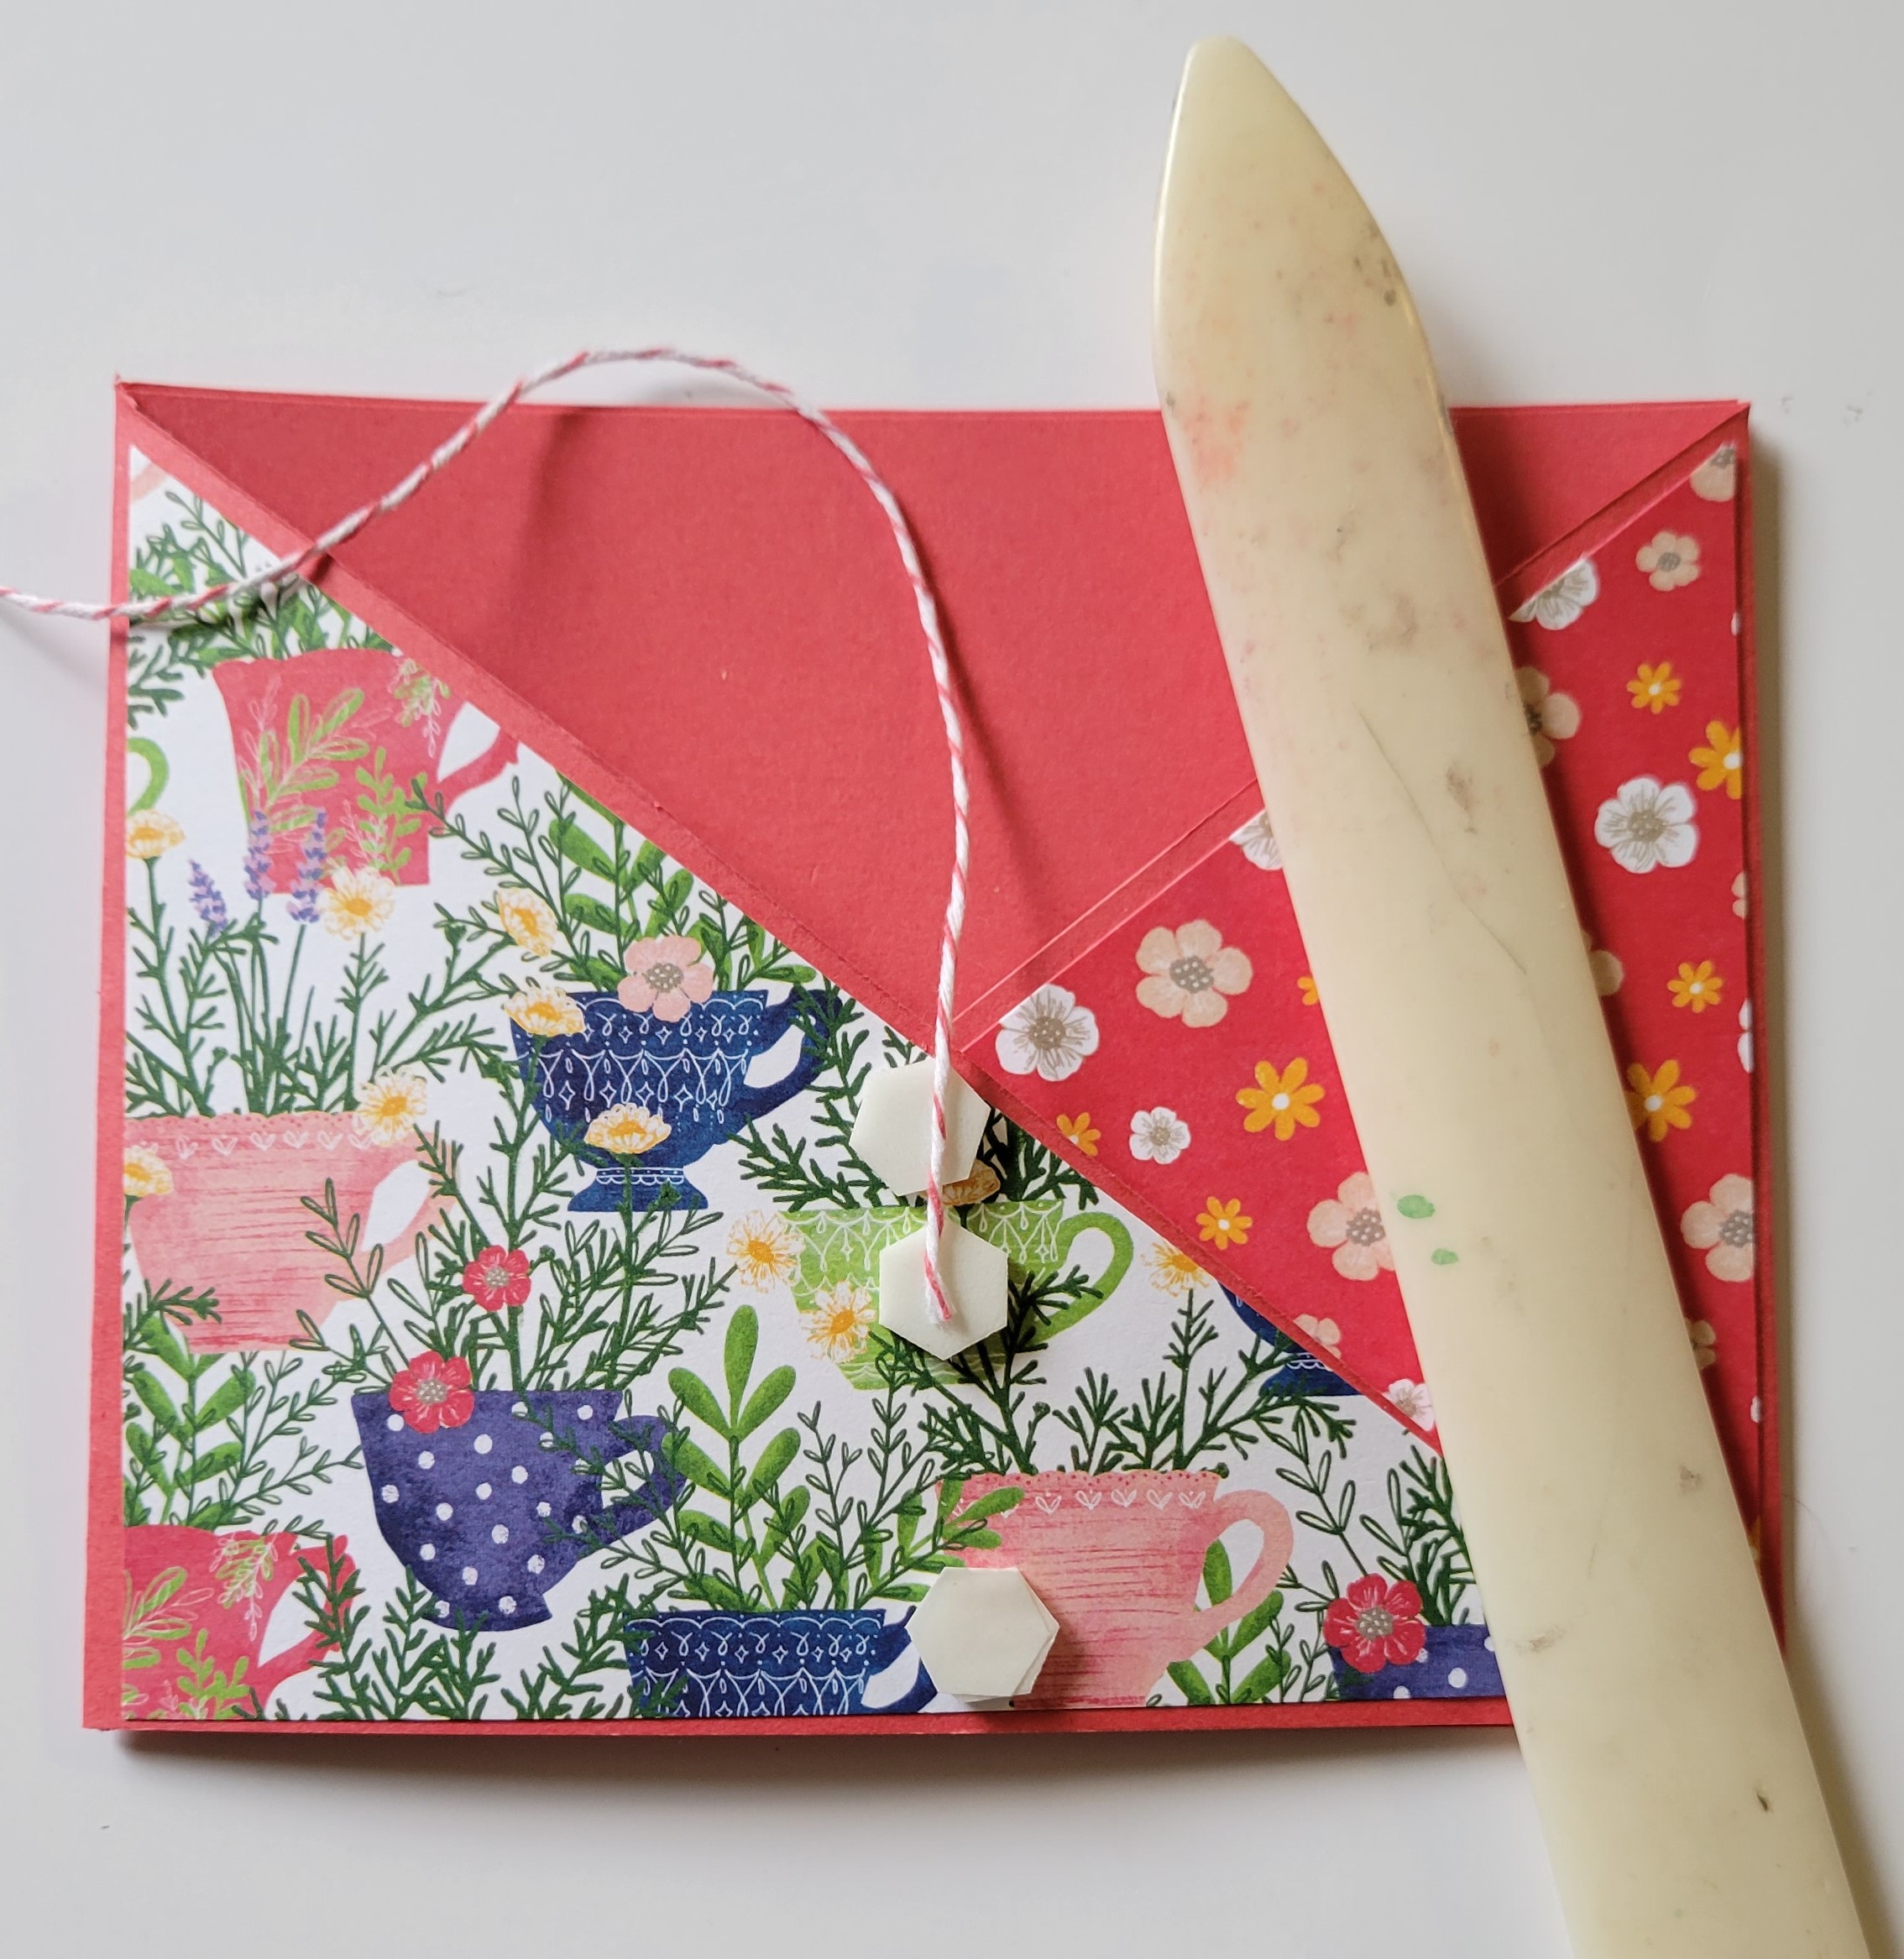
Step 10: Place teacup over the dimensionals with the twine over the front. Stamp and diecut the Time for Tea greeting on white cardstock for the front of the tag and diecut a solid piece from one of the scraps for the back. Place the solid diecut for the tag on the bottom dimensional and adhere the twine over it trimming it off so no twine will show at the bottom. Adhere the stamped tag over top. (I used Adhesive Sheet on the solid scrap for the tag so it will adhere to the stamped tag piece more easily).


Step 11: Make the lemon slice by cutting the solid die from the Crushed Curry colour designer series paper and the detailed piece from a solid piece of Crushed Curry cardstock backed with the Adhesive Sheet. Die cut hearts or other items as desired to decorate card.
Step 12: Make bellyband if using or wrap twine around the card to tie in the front. Decorate with matte adhesive dots and/or other embellishments.
Step 13: Stamp the insert as desired and adhere the .75”x5.25” strip of designer series paper across the top of the insert.Place the greeting insert inside the card and tuck in a tea packet so it is behind the teacup.

Here is one of the cards I made showing it open:


Here are some variations I made:


Howdy, from extremely hot Southeast Texas. City of Warren. I am a ministry/hobbyist. Our church did our 1st Annual Tea Party. It was fantastic. Your Tea Card Holder is beautiful. I am going to use the same concept for our next Tea Party. Thank you soooo much for sharing. I am going to order the set anyway but now it is a must. Susan Ward
ReplyDeleteIt is very versatile and I had to find a way to really showcase the idea of tea!
DeleteSuch a fun one!
ReplyDeleteGreat project and perfect for the tea suite!
ReplyDeleteThank you! It is a versatile set!
DeleteCute fun fold card Xenia, love that dsp x
ReplyDeleteThat dsp is so cute!
DeleteLovely x
ReplyDeleteThanks Karen
DeleteGreat card and love the fold!
ReplyDeleteThank you!
DeleteI love a card with a fun fold - great invite or thanks for a tea party
ReplyDeleteIt would make a great invite! I had not thought of that!
Delete